> For the complete documentation index, see [llms.txt](https://sharinghub.kittenbot.hk/llms.txt). Markdown versions of documentation pages are available by appending `.md` to page URLs; this page is available as [Markdown](https://sharinghub.kittenbot.hk/airelated/koi/makecode/line.md).
# 線條檢測追蹤
線條追蹤一般用作小車子巡線,本節教程將教導大家將偵測到線條之座標(X1,Y1)和(X2,Y2)顯示到OLED上面。
### Robotbit接線[¶](broken://pages/7JNEwsOBKCiOgkjDg5Uc)
本教程以Robotbit為例,當然你也可以用Powerbrick,用Powerbrick就不會接錯線。
本教程會使用OLED顯示屏,所以推薦使用Robotbit。
### 編寫線條追蹤程式[¶](broken://pages/7JNEwsOBKCiOgkjDg5Uc)
 #### 加載KOI插件:[¶](broken://pages/7JNEwsOBKCiOgkjDg5Uc)
#### 在擴展頁直接搜尋KOI (KOI已經過微軟認證,可以直接搜尋)[¶](broken://pages/7JNEwsOBKCiOgkjDg5Uc)
#### 加載KOI插件:[¶](broken://pages/7JNEwsOBKCiOgkjDg5Uc)
#### 在擴展頁直接搜尋KOI (KOI已經過微軟認證,可以直接搜尋)[¶](broken://pages/7JNEwsOBKCiOgkjDg5Uc)
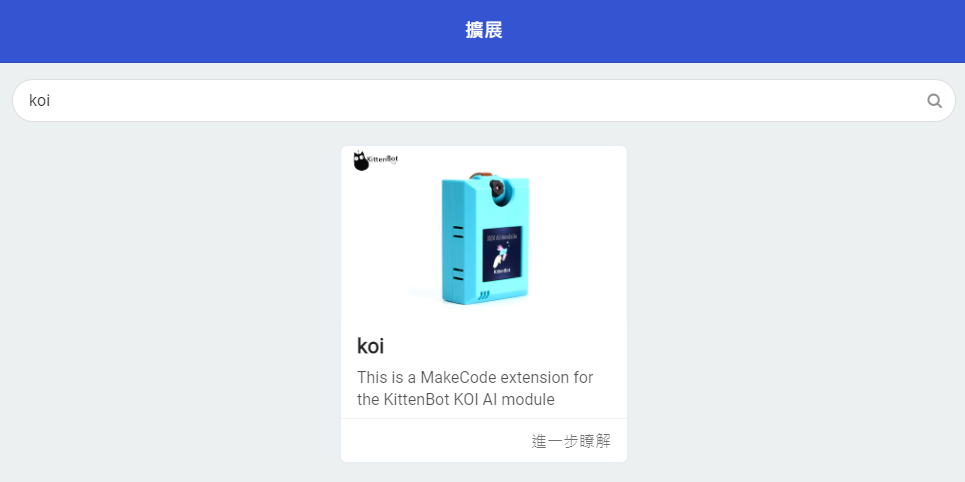 #### 你亦可以用插件地址搜尋[¶](broken://pages/7JNEwsOBKCiOgkjDg5Uc)
KOI插件:
線條檢測積木塊:
#### 你亦可以用插件地址搜尋[¶](broken://pages/7JNEwsOBKCiOgkjDg5Uc)
KOI插件:
線條檢測積木塊:
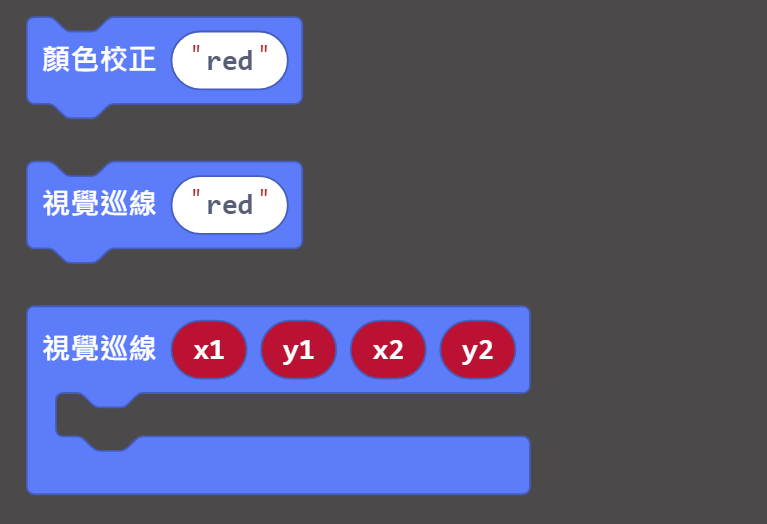 編寫程式:
{% embed url="" %}
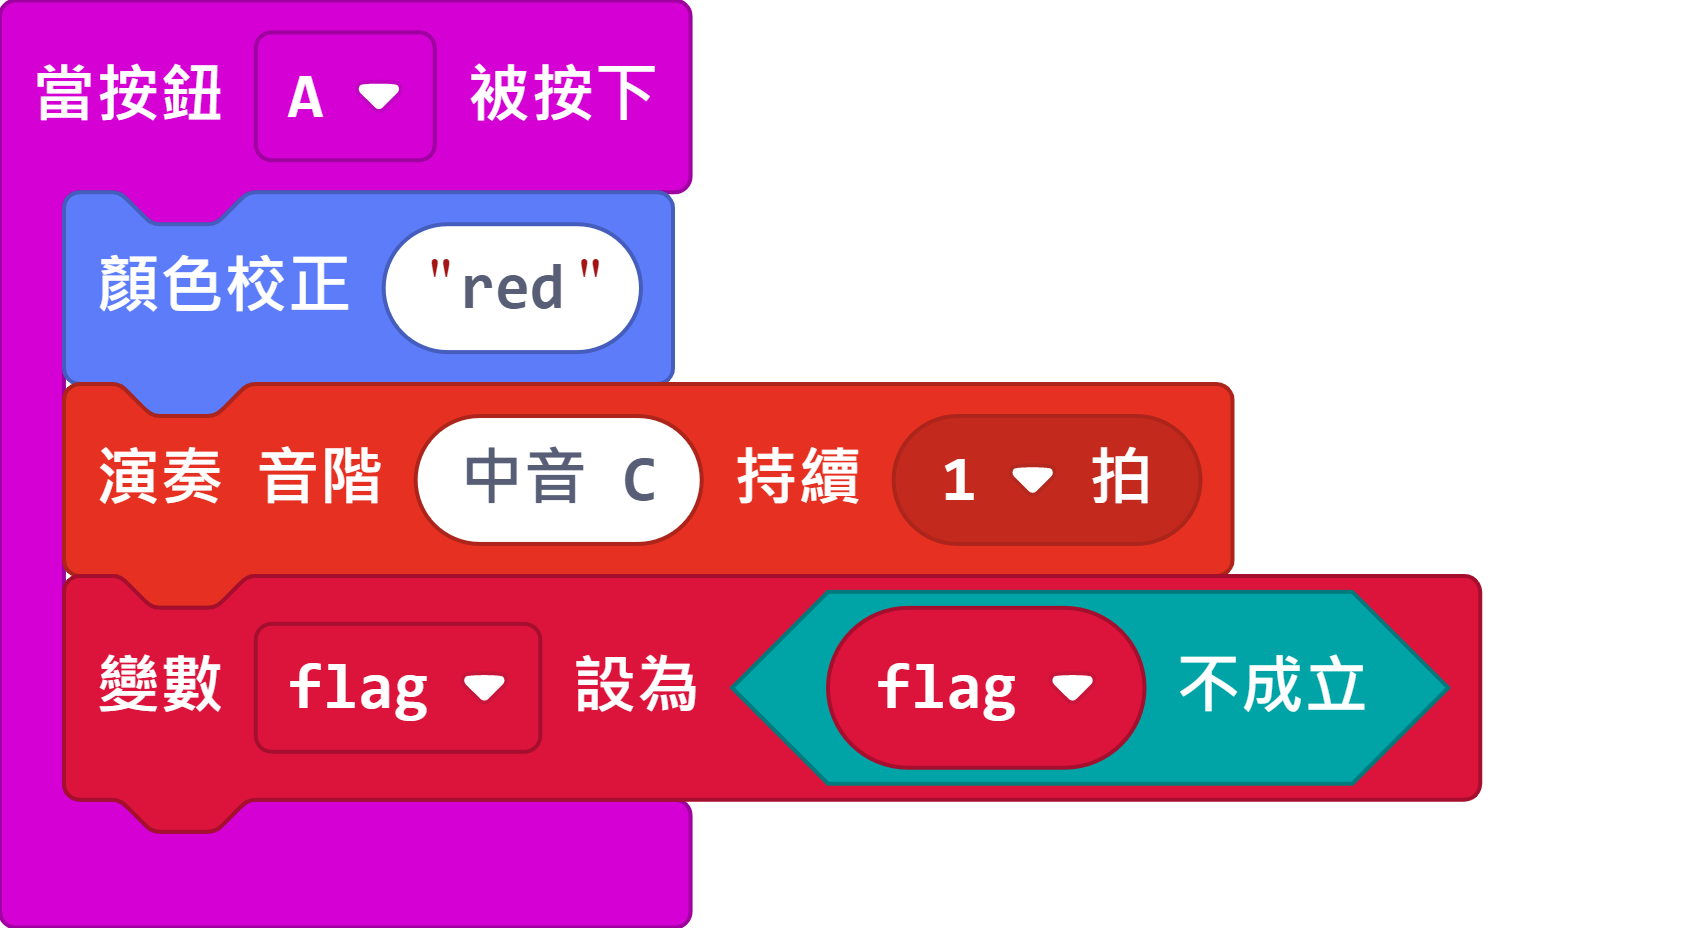
### 按鍵A觸發顏色追蹤[¶](broken://pages/7JNEwsOBKCiOgkjDg5Uc)
巡線追蹤和顏色追蹤相似,大家都需要首先進行顏色校正。
您可以定義顏色的名稱。KOI可以校正並追蹤多種顏色。
編寫程式:
{% embed url="" %}
### 按鍵A觸發顏色追蹤[¶](broken://pages/7JNEwsOBKCiOgkjDg5Uc)
巡線追蹤和顏色追蹤相似,大家都需要首先進行顏色校正。
您可以定義顏色的名稱。KOI可以校正並追蹤多種顏色。
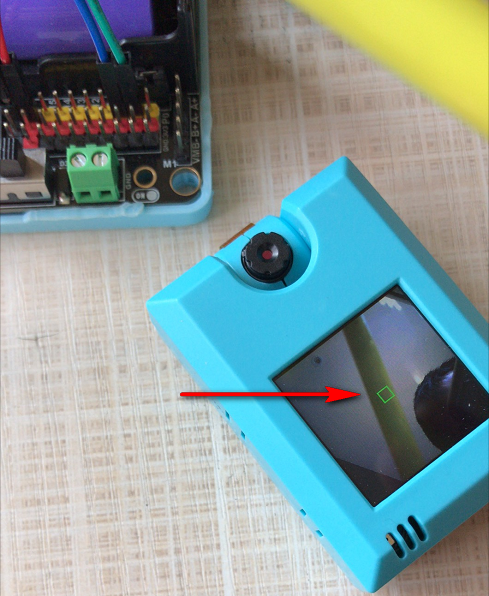
 觸發顏色追蹤之後,在AI鏡頭的屏幕中央會出現一個綠色小方格,將要辨識的顏色對準方格(這裡用了一支黃色筆為例),等待數秒,待屏幕上沒有方框就為之完成。
要注意的是校正的顏色需要與背景有明顯的分別才能夠準確校正。
觸發顏色追蹤之後,在AI鏡頭的屏幕中央會出現一個綠色小方格,將要辨識的顏色對準方格(這裡用了一支黃色筆為例),等待數秒,待屏幕上沒有方框就為之完成。
要注意的是校正的顏色需要與背景有明顯的分別才能夠準確校正。
 ### 程式流程[¶](broken://pages/7JNEwsOBKCiOgkjDg5Uc)
將程式下載到Microbit上。
將要追蹤的筆直線狀物件放在鏡頭前(例如原子筆),按下按鍵A進行顏色校正。
校正成功後,可以看到被偵測線段的2組座標顯示在Microbit的顯示屏上。
### 進階程式[¶](broken://pages/7JNEwsOBKCiOgkjDg5Uc)
由於Microbit的顯示屏不能長時間顯示信息,本教程會教大家使用OLED顯示屏。
加載OLED插件:
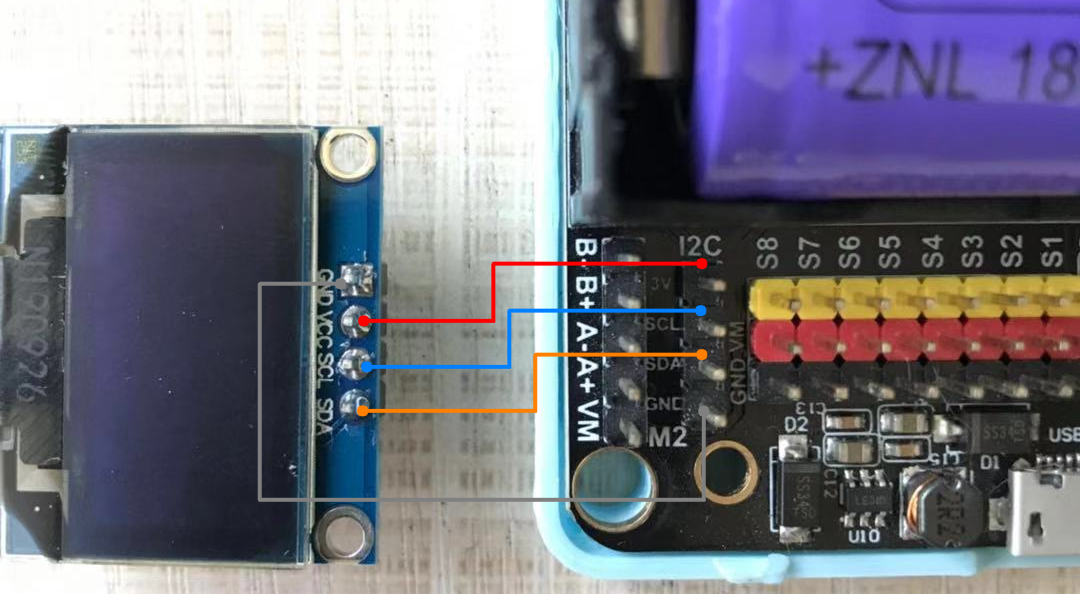
請按照圖例連接OLED與Robotbit,確認妥當接線後再打開電源。
### 程式流程[¶](broken://pages/7JNEwsOBKCiOgkjDg5Uc)
將程式下載到Microbit上。
將要追蹤的筆直線狀物件放在鏡頭前(例如原子筆),按下按鍵A進行顏色校正。
校正成功後,可以看到被偵測線段的2組座標顯示在Microbit的顯示屏上。
### 進階程式[¶](broken://pages/7JNEwsOBKCiOgkjDg5Uc)
由於Microbit的顯示屏不能長時間顯示信息,本教程會教大家使用OLED顯示屏。
加載OLED插件:
請按照圖例連接OLED與Robotbit,確認妥當接線後再打開電源。
 編寫程式:
{% embed url="" %}
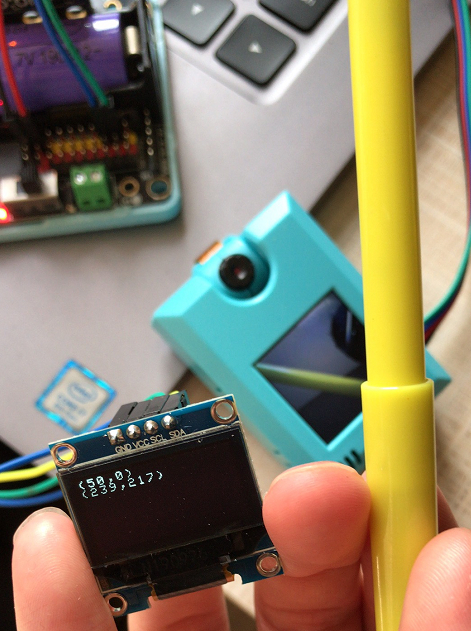
程式流程與基本程式相同,可以看到被偵測線段的2組座標顯示在OLED顯示屏上。
編寫程式:
{% embed url="" %}
程式流程與基本程式相同,可以看到被偵測線段的2組座標顯示在OLED顯示屏上。
 ### 插件版本與更新[¶](broken://pages/7JNEwsOBKCiOgkjDg5Uc)
插件可能會不定時推出更新,改進功能。亦有時候我們可能需要轉用舊版插件才可使用某些功能。
詳情請參考: [Makecode插件版本更換](/programmingplatforms/makecode/makecodeextupdate.md)
### FAQ[¶](broken://pages/7JNEwsOBKCiOgkjDg5Uc)
#### 1: 為什麼我重新開機,按下按鍵A,但不能進行顏色校正?[¶](broken://pages/7JNEwsOBKCiOgkjDg5Uc)
· 答:打開電源後, KOI 及microbit 同時起動; 相對上, Microbit 所需的起動時間比KOI魔塊短, 引致 Microbit的初始化程式已經跑完了,KOI還沒完全起動, 因此按下A鍵沒有反應。
· 解決辦法:打開電源後,重新按下Microbit背後的Reset按鍵,讓Microbit重新開始運行(秘訣就是讓KOI魔塊先完全運行起來,再讓Microbit 跑初始化程式)
#### 2: KOI鯉魚魔塊我直接3V電源可以嗎?[¶](broken://pages/7JNEwsOBKCiOgkjDg5Uc)
· 答:不行,必須要接5V!
#### 3: 如何提高巡線的準確性?[¶](broken://pages/7JNEwsOBKCiOgkjDg5Uc)
· 答:盡量保持簡潔的背景,並使用與背景顏色有明顯分別的物件。
### 插件版本與更新[¶](broken://pages/7JNEwsOBKCiOgkjDg5Uc)
插件可能會不定時推出更新,改進功能。亦有時候我們可能需要轉用舊版插件才可使用某些功能。
詳情請參考: [Makecode插件版本更換](/programmingplatforms/makecode/makecodeextupdate.md)
### FAQ[¶](broken://pages/7JNEwsOBKCiOgkjDg5Uc)
#### 1: 為什麼我重新開機,按下按鍵A,但不能進行顏色校正?[¶](broken://pages/7JNEwsOBKCiOgkjDg5Uc)
· 答:打開電源後, KOI 及microbit 同時起動; 相對上, Microbit 所需的起動時間比KOI魔塊短, 引致 Microbit的初始化程式已經跑完了,KOI還沒完全起動, 因此按下A鍵沒有反應。
· 解決辦法:打開電源後,重新按下Microbit背後的Reset按鍵,讓Microbit重新開始運行(秘訣就是讓KOI魔塊先完全運行起來,再讓Microbit 跑初始化程式)
#### 2: KOI鯉魚魔塊我直接3V電源可以嗎?[¶](broken://pages/7JNEwsOBKCiOgkjDg5Uc)
· 答:不行,必須要接5V!
#### 3: 如何提高巡線的準確性?[¶](broken://pages/7JNEwsOBKCiOgkjDg5Uc)
· 答:盡量保持簡潔的背景,並使用與背景顏色有明顯分別的物件。