# 轉接模組校正(重新較正用)
### Kittenbot 的pH酸鹼值探測組合在出廠時已經進行了轉接模組較正,一般用家並不需要進行硬體校正, 請參考[用前小知識](/functional_modules/ph/phsensor.md)。
### 如pH酸鹼值探測組合在長時間沒使用,才建議對模組進行校正。(極少需要)
#### 重申: 此校正步驟 ,只需進行一次,並非每次使用前都需要進行
### 如何對轉接模組進行較正?
1. 按接線方式, 把pH探測組合接上擴展板及microbit, 詳情請參考[接線教學](/functional_modules/ph/phsensor.md)。
2. 下載以下程式到micro:bit。
{% embed url="" %}
打開[參考程式](https://makecode.microbit.org/_gmJbuk5UbHEs)
#### 3. 使用一字螺絲批調節模組上的電位旋鈕
 #### 4. 將pH探測棒的保護蓋拆開,然後浸入pH6.86校正液,並等待大約1分鐘。
#### 5. 當micro:bit顯示向上箭咀,請將模組上的電位器順時針扭動。
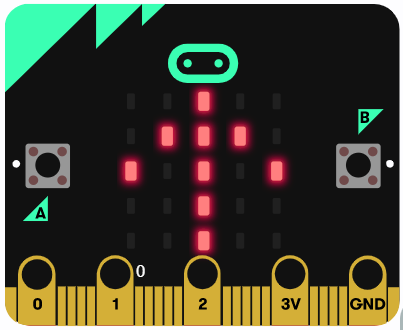
#### 6. 當micro:bit顯示向下箭咀,請將模組上的電位器逆時針扭動。
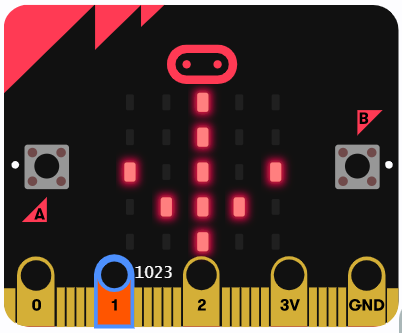
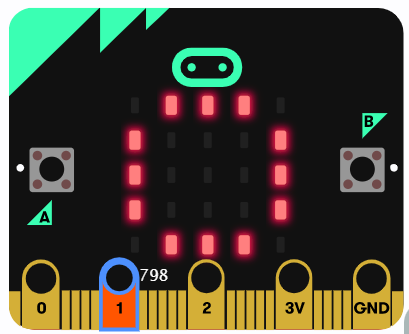
### 請慢慢扭動電位器,直至micro:bit顯示圓圈圖案。
### pH感應器MakeCode參考程式
### pH轉接模組初次校正示範短片
{% embed url="" %}
---
# Agent Instructions: Querying This Documentation
If you need additional information that is not directly available in this page, you can query the documentation dynamically by asking a question.
Perform an HTTP GET request on the current page URL with the `ask` query parameter:
```
GET https://sharinghub.kittenbot.hk/functional_modules/ph/phtune.md?ask=
```
The question should be specific, self-contained, and written in natural language.
The response will contain a direct answer to the question and relevant excerpts and sources from the documentation.
Use this mechanism when the answer is not explicitly present in the current page, you need clarification or additional context, or you want to retrieve related documentation sections.
#### 4. 將pH探測棒的保護蓋拆開,然後浸入pH6.86校正液,並等待大約1分鐘。
#### 5. 當micro:bit顯示向上箭咀,請將模組上的電位器順時針扭動。

#### 6. 當micro:bit顯示向下箭咀,請將模組上的電位器逆時針扭動。

### 請慢慢扭動電位器,直至micro:bit顯示圓圈圖案。

### pH感應器MakeCode參考程式
### pH轉接模組初次校正示範短片
{% embed url="" %}
---
# Agent Instructions: Querying This Documentation
If you need additional information that is not directly available in this page, you can query the documentation dynamically by asking a question.
Perform an HTTP GET request on the current page URL with the `ask` query parameter:
```
GET https://sharinghub.kittenbot.hk/functional_modules/ph/phtune.md?ask=
```
The question should be specific, self-contained, and written in natural language.
The response will contain a direct answer to the question and relevant excerpts and sources from the documentation.
Use this mechanism when the answer is not explicitly present in the current page, you need clarification or additional context, or you want to retrieve related documentation sections.